Product added to cart
How to Use a Multimeter
0%
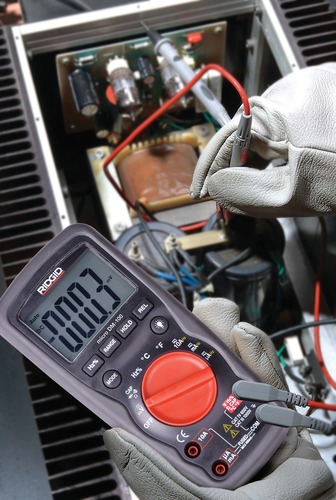
A multimeter is a useful tool to have around because it can test a variety of electronic components. A multimeter can be a handy tool for homeowners to test batteries. Electricians can also use it to test wires.
America Tools, located in Miami, Florida, is a top supplier of tools for customers nationwide. We have various multimeters available from top tool manufacturers. Here, we explain how to use a multimeter.
What Is a Multimeter?
A multimeter is an electrical tester used to measure multiple electrical values. There are digital and analog multimeters, and they measure the following:
Current
Current is the amount of electricity flowing through a circuit and it is measured in amps. The number of amps flowing through a circuit is the difference between the voltage applied and the resistance present. A milliamp is 1/1,000 of an amp and is the most common unit of amps measured with a multimeter.
Resistance
Resistance is the opposition to the flow of current through a circuit. Essentially, it is the force that counteracts the flow of electricity. It is measured in ohms. Digital multimeters also test for continuity, which is the absence of resistance within a circuit.
Voltage
Multimeters can test two forms of voltage: alternating current (AC) and direct current (DC). AC is the voltage used in a home’s electrical wiring, while DC is used primarily in batteries for vehicles, residential solar systems, and consumer electronics. Voltage is measured in volts.
Don’t confuse a voltmeter for a multimeter. The main difference is that a voltmeter is a specialized tool that only measures voltage, while a digital multimeter can measure voltage, current, and resistance.
Measuring AC Voltage
The most common use of a multimeter is to check AC voltage, like in a plug on an appliance or an outlet. The multimeter can be used to help isolate an electrical problem. To test something for AC voltage, follow these steps:
-
Turn off all power to the plug.
-
Set the mode on the multimeter to AC voltage. Make sure the multimeter is set higher than the voltage number printed on the cord.
-
Connect the black probe to the common jack on the multimeter. Plug the red probe into the jack labeled as AC voltage or ohms/omega.
-
Place the end of the black probe into the neutral slot. On a polarized plug, it's the wider prong. Next, put the red probe into the hot slot on the plug.
-
Now it’s time to check the reading. What the multimeter measures will be displayed on the screen.
-
After the reading is taken, remove the red probe, and then the black probe from the item that was tested. Unplug in that same order.
Measuring DC Voltage
To measure the voltage in a car battery, the multimeter will need to be set to DC. The process is similar to checking for AC voltage. To test a car battery for DC voltage, follow these steps:
-
Disconnect the battery from any power tools or chargers. Car batteries can be tested in place after the headlights have been on for two minutes and then turned off.
-
Set the multimeter to measure DC voltage.
-
Insert the black probe into the common jack and plug the red plug into the jack labeled for DC.
-
Touch the black plug to the negative side of the battery and touch the red probe to the positive terminal. The reading will be shown on the digital screen of the multimeter.
-
Disconnect the red probe, then the black probe.
If the digital multimeter reading is negative, switch the black and red probes for a positive reading. It should be the same number but without a minus symbol. However, don’t mix up the positive and negative sides of an analog multimeter because it can damage the tool.
Testing for Resistance
Measuring resistance is useful for those who repair electrical components. Resistors need to carry the correct amount of power to function. To test the resistor for a repair project, follow these steps:
-
Completely disconnect the component that is being tested. Remove it from all live circuitry, including plugs and batteries. You want zero current flowing.
-
Set the multimeter to the ohm meter function. If the resistor is labeled with a number, set it to that.
-
Plug the multimeter probes into the jacks labeled common and VΩ (DC voltage). Use the black plug for common and the red plug for DC voltage.
-
Start measuring around the 200-ohms or higher range. Some models will show a “1” reading. This means the resistor has a higher capacity than your current setting.
-
Touch the probes to either side of the item that is being tested. Positive and negative doesn’t matter in this case.
-
Move down the ohm range on the multimeter gradually. When you’re in range, the reading will make sense. The “1” or “OL” on a digital multimeter will change to a number.
-
If you’re not getting a proper reading, turn down the multimeter range. A high setting won’t pick up low ohms.
Find Multimeters at America Tools
America Tools is a top distributor of popular professional-grade tools, like Greenlee, Makita, and RIDGID, for customers throughout the United States. Based in Miami, Florida, America Tools is known for its customer service. We are always available to answer any questions our customers have. We can be reached by phone, email, or through our 24/7 chat. We are available to help customers decide what tools they need for any job. Contact us today to learn more about our entire stock of professional-grade tools, including multimeters.